
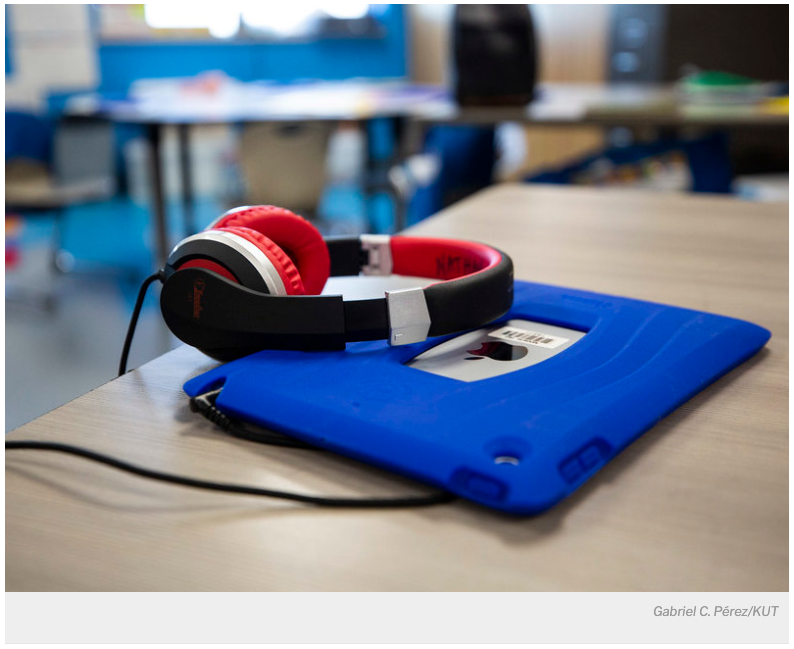
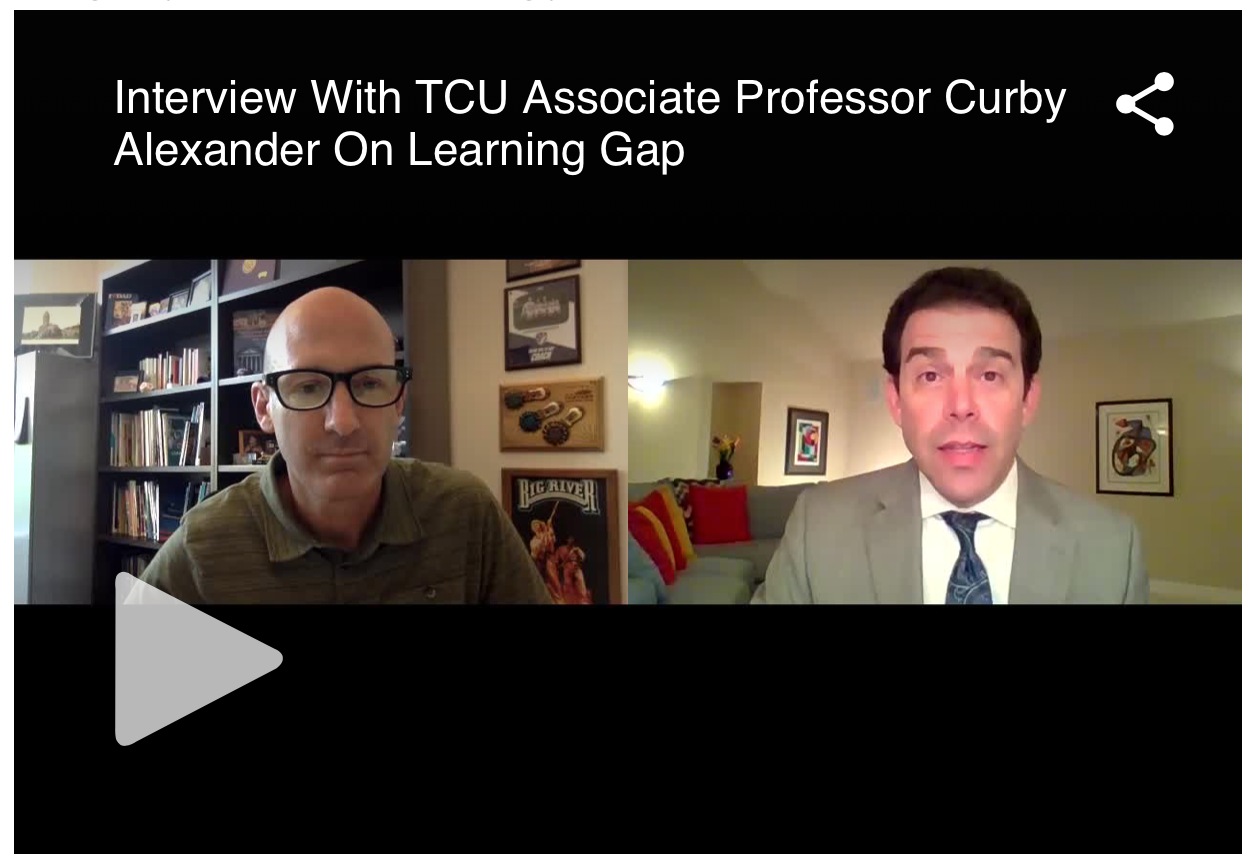
No more snow days? Here’s how else school in Fort Worth might change after COVID-19.
/I enjoyed being interviewed for this article in the Star-Telegram ... even better was reading it and finding out the focus of the article was on the amazing, one and only Hallie Poe from Ridglea Hills!! She is an amazing teacher and my boys loved her class!

K12 Online Conference 2015
/A summary of my presentation (and a link!) to 2015 K-12 online conference. Read more …
Read MoreManaging Learners: Tools for organizing your class
/Of the many ways ITC has changed (and is changing) education, none seem more obvious than e-mail and learning management systems. It seems students these days expect ubiquitous, continuous access to course content and their teachers. How do I know this? Well, for one, I commonly get e-mails from students in the middle of the night. I am no longer surprised when I wake up in the morning to e-mails from students, most of them sent well past midnight. I do not think they expect an immediate response, but it reveals a student's mindset when you see he has sent a message in the middle of the night the instant he had a question about an assignment or grade. Second, my students are quick to let me know if they cannot access a course document or cannot see their grade. If the gradebook in my LMS were a section of the Oregon Trail, it would look like this.

The course syllabus? It probably looks more like this.

I am digressing. Anyway, teachers these days must anticipate the "right here, right now," mindset of many students and parents. Over time, report cards were augmented by weekly take-home folders, then daily homework planners, and now the LMS has crept into K-12 schools. Some schools have adopted an LMS that every teacher is expected to use. This was the case at the private school where I worked a few years back. Teachers at this school were expected to post grades, assignment details, worksheets, and other announcements each week. In other cases, a teacher may choose, independent of the rest of the school, to use an LMS in this way with students and parents.
This past week in my class, we explored various options available to teachers who want to use an LMS for managing learners and organizing content for their class. Before we looked at any platforms, we discussed the features one would expect to see in a LMS, and we listed them on a shared Google Doc, which the students filled out as they explored. Here are the results of our exploration.
| Features | Edmodo | Chalkup | Homeroom |
| Upload course materials | ✓ | ✓ | ✓ |
| Upload materials in a variety of media (e.g., post a video for students to watch) | ✓ | ✓ | |
| Discussion tool | ✓ | ✓ | |
| Message tool | ✓ | ✓ | |
| Announcement tool | ✓ | ✓ | |
| Dashboard with upcoming assignments | ✓ | ✓ | ✓ |
| Submit assignments | ✓ | ✓ | ✓ |
| Submit using a variety of tools | ✓ | ✓ | ✓ |
| Quiz tool | ✓ | It may be there, but we couldn't find it | ✓ |
| Embed content from other sources | ✓ | Only from pre-selected sources | |
| Features of this tool that may be particularly appealing. | Links to Google Drive, Archives class data, calendar linked to assignments for multiple classes. | Teacher can annotate papers, messaging feature, flashcards | Interfaces with Apollo (the BYOD presentation tool). Quizzes can be tracked in realtime using a simple dashboard. |
There are some obvious omissions on this list: Schoology and Google Classroom. This is mainly because we only had 2 hours and 40 minutes, so I had to make some choices about what to analyze. We already had someone demonstrating Edmodo, and I felt like Schoology was similar enough to skip past it. Some of the students actually mentioned it as we discussed Edmodo, and they were able to identify the similarities and differences themselves. I would have LOVED to show the class Google Classroom. I would love to see Classroom for myself, for crying out loud! Yes, most of their tools and features are available and free to everyone, but there are some that are not. This is especially true of GAFE, where if you are not in the club, you are WAY out of the club. So, this class exercise was not exhaustive, but I believe it gave the students an in-depth look at different ways to design an interface, features to include and leave out, and how easy different tools are to use.
What am I missing (and don't say Google Classroom!)? Are there features or whole platforms I didn't address?
Outsmarting the LMS: Creating a DIY Learning Module
/Everyone is talking about the "flipped classroom." I just attended a conference where this term was used approximately 57 times every hour for 4 days. My first response to this term was positive when I heard it a few years ago. The flipped classroom is a teaching approach where teachers provide resources for students to build their background knowledge outside of class and use class time on activities that leverage face-to-face interaction, such as discussion, group problem-solving, and collaboration. This contrasts with the "traditional" model, where instructors spend class time transmitting information, and then require students to engage in the aforementioned higher-level learning tasks on their own outside of class. This concept has so much curb appeal because students, generally speaking, don't like lectures, and instructors don't really like the behaviors associated with lecturing (e.g., falling asleep, playing on phones, doing homework for other classes). Once you strip away the buzz words, the descriptions of "kids these days and their mobile computer thingies," and a mish-mash of learning theories, you realize the basic premise is the same model teachers have used for years. My teachers assigned reading outside of class, my coaches required me to lift weights and do endurance runs (yes, I'm a runner) on my own, and my music teachers expected me to practice my part so that group rehearsals were about dynamics, tempo, and other music terms I can't seem to recall. The difference, of course, is that technological innovations have changed the variety and delivery method of learning materials being pushed to students before they come to class. Teachers can compile videos, readings, simulations, quizzes, games, and other media to communicate the same concepts that were traditionally transmitted in class via lecture.
There are many tools on the web that help an instructor facilitate a flipped lesson. EdPuzzle, eduCanon, and Ted-Ed come to mind. Each of these tools has its unique affordances, but they require students to have an account and to sign in. What if you want to avoid that part and skip straight to the learning module? This is where Google Drive comes in. I will briefly demonstrate how to build a DIY learning module with Google tools and add-ons.
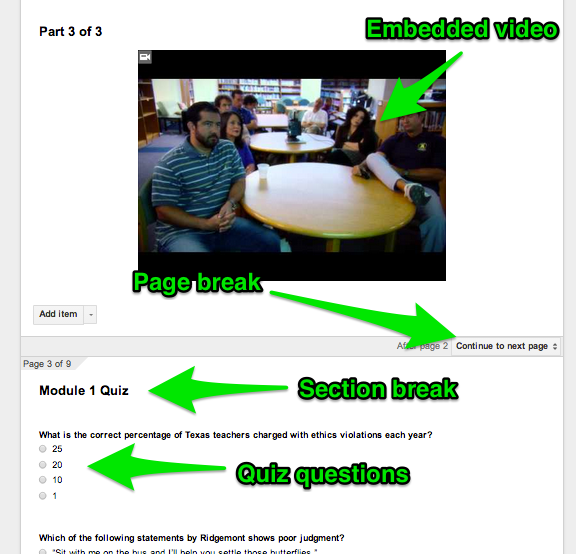
Step 1: Create a Google Form
Google Forms is an excellent tool for creating web-based surveys. Users can add a variety of questions, from simple text to a grid. There are also some simple media and layout tools, such as adding images and video, page breaks and section headers. These are all great tools if you want to manage the flow of the survey. Google has created some excellent tutorials on how to create and use their forms. Below is an example of one of my forms I created a for a learning module in my college. The videos were created by a state agency for the purposes of a required training that is no longer supported by said agency. In other words, they gave us the videos and want us to handle the training in-house.
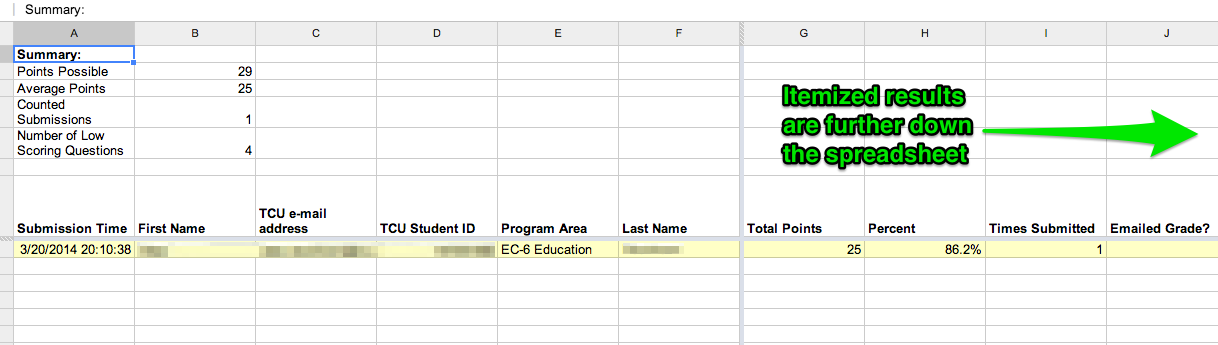
Step 2: Set up the spreadsheet
The results from this form will automatically feed into a Google Spreadsheet. This is a great way to keep track of who has completed the training, but by itself a spreadsheet is not very useful for grading the quiz. Using a simple script for Google Sheets called Flubaroo, you can create a key and automatically grade the results. The scored quizzes are put in a new sheet within the spreadsheet, and it will also e-mail the results to each student, if you choose that option. I have the spreadsheet set up so I am notified every time there is a change. Here is a example of a graded quiz.
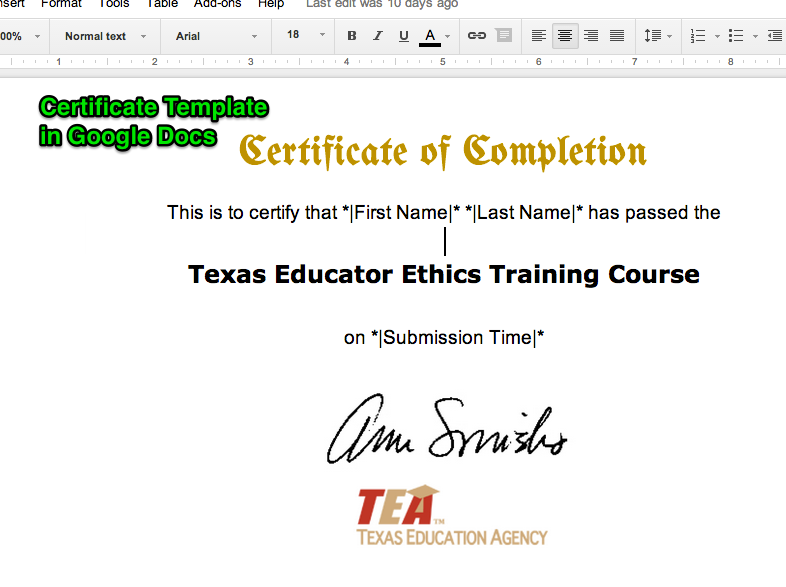
Step 3: Create a certificate of completion
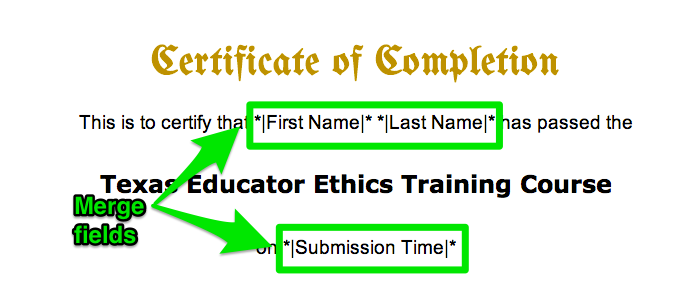
In my case, the students and faculty who complete this training need a certificate. The state agency used to do this automatically through their training module, but now we have to do it. Since there are so many people completing this training, I needed a tool to automate most of the process. My tool of choice is the Google Docs add-on Merge by MailChimp. To do this, you first add the add-on to your Drive account. You then create a merge template, like the one below:
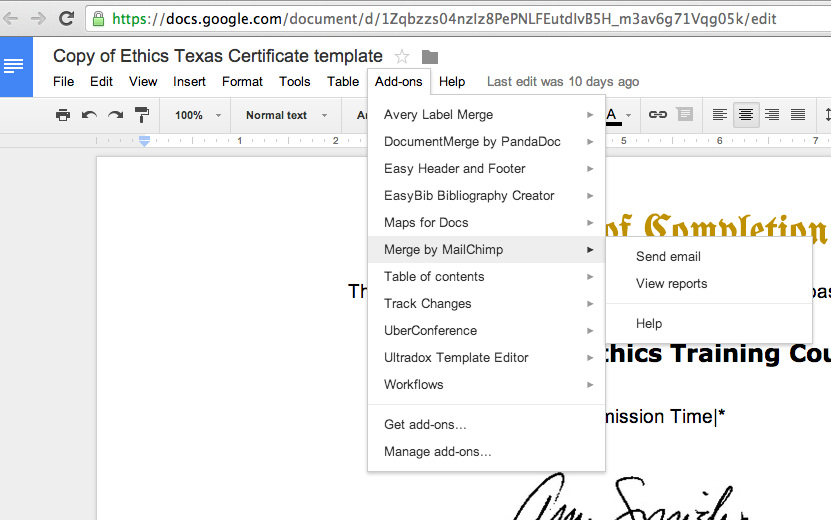
Next, you open the Merge by MailChimp panel.
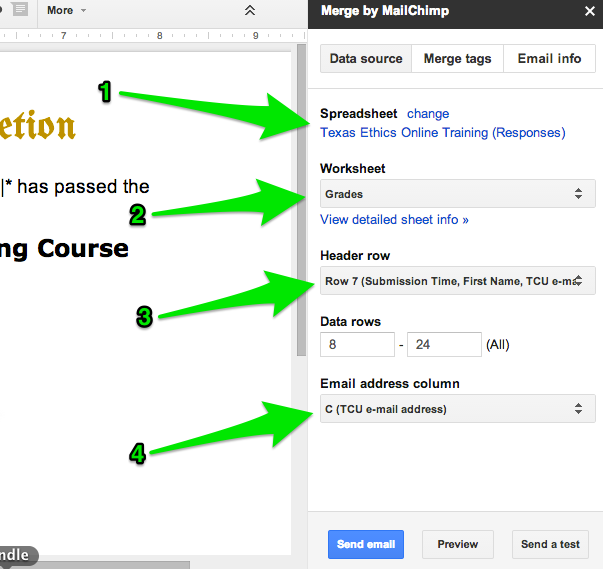
You will need to do some clicking to merge your two documents by:
- Choosing the spreadsheet you will use as your data source
- Choosing the sheet from within your spreadsheet
- Identifying the header row (which will determine the names of the merge tags)
- Identifying the column with e-mail addresses, where the merged documents will be sent
You will also need to add merge fields to the document, which will pull data from the spreadsheet and input it into the template. You do this from the Merge Tags section in the MailChimp panel by simply placing the cursor in the document where you want the merge tag and clicking the merge tag in the panel.
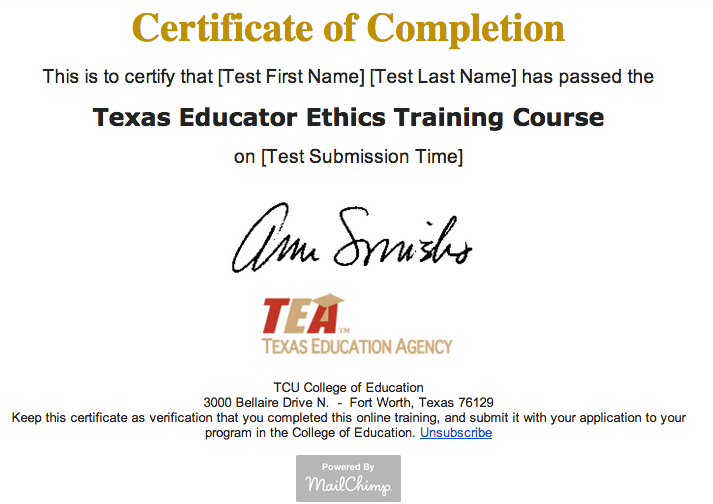
The form that is mailed to each person in your spread sheet will look something like the screenshot below. Notice, the person's e-mail client may strip out some of the formatting, such as fonts or colors. The details at the bottom of the merged document were added from the Email Info tab in the MailChimp panel. Also, the merge fields in the actual e-mail will not have brackets.
And there you have it. Yes, it is pretty involved, but not much more than doing the same thing through SoftChalk or iSpring or any other eLearning tool, and it is totally FREE! This method could be used to give students survey or test results with feedback, digital badges, or progress reports. I should add one final word, which is that there will be some tinkering along the way. Each tool I presented here has a learning curve, and unless you have used mail merge in MS Word before, this will take some patience and repetition. Coming from someone who has done this using just about every possible method and tool, this process is pretty slick once you get used to it.
So, what tools do you use for this type of learning object? Is there a step I am missing or an easier way to do this? Let me hear from you.
Studying with Google Hangouts on Air
/![]()
A few months ago I wrote about using Ustream to broadcast an online study session with my large class. I used it twice, and it worked pretty well both times. The main hangup I had with this tool was that I had to download a separate program to display my screen to the students. I was able to figure it out pretty easily, but I prefer tools that do not require any downloads.
This semester when I was planning the different activities for the students, I thought about trying Google Hangouts on Air. I actually thought about using it last semester but there were a few issues that made me gun shy. First of all, there is a significant lag between when I show something and when the audience sees it. This isn't a huge deal, but I was worried it might be a distraction to the students. What I discovered is that this is not even noticeable to the students because they don't know when I start speaking. The other issue I had was that students had to have a Google account in order to post questions. Honestly, I did not want to manage everyone getting a Google account, so I opted for Ustream and TodaysMeet for students to post questions.
After some thought, I jumped in with Hangouts on Air, and I could not be happier about this decision. First of all, students who really want to ask a question will figure out the Google account thing. I did not have one complaint or issue arise over this detail, so it turned out to be nothing to be worried about. Here are some of the features that make Hangouts on Air perfect for an online study session:
- Q&A: Students can post questions to the Q&A tool, and I select them as I answer each question. The beautiful thing about this tool is that once the session is over, the Q&A tool becomes like a set of bookmarks that will snap to the exact part of the recording that addresses each question. Students to have to be signed into Google to post a question, but as I said before this did not prohibit students from asking their questions.
- Screen Sharing: Hangouts comes with a lot of built in tools, one of which is screen sharing. This invaluable when it comes to putting up slides from class or drawing diagrams. I mean, who wants to just listen to me talk and see my face for an hour? I would much rather hide behind my bullet points.
- Browser based: Hangouts is also completely housed in the browser, so there is nothing to download (other than the plug-in which accesses your mic and camera).
- Scheduled Events: You can actually set up the hangout in advance and invite people to view it. This is very helpful for people like me who tend to forget things because Google will send reminders that the event is coming up.
- Session Recording: This feature only applies to Hangouts on Air, but once you go live it starts recording. This is also a great way to create screencasts with book marks to different steps in the process.
I was pleasantly surprised how easy this tool is to use, and how many features it has built in. I will definitely use it for future study sessions, and I may even find ways to do it better. In case you are interested. Here is a link to the recording from a few nights ago: Online Study Session.
Video Conference Tools: Choices, choices
/
Tonight in my graduate technology class, we spent most of the meeting testing and discussing a variety of video conferencing tools. I had a few criteria for choosing the tools we would demo:
- The tool had to have at least a free entry-level account
- The tool had to stream a video feed in real time
- The tool could not rely on installed software on both sides of the call (I strayed from this criterion with Skype)
So, my criteria were pretty simple, but considering the context of my learning environment, each of these was pretty important. I teach in a computer lab, and the computers do not allow installations. I did not have time to install software ahead of time, so I stuck close to applications that don't require a download and installation. The tools I chose were:
You can see the detailed results of our class meeting on Video Conferencing document.
Skype
The first tool we looked at was Skype. This video tool has been around for quite awhile, in tech years. I remember using it in 2006 to conference with people at different universities all over the country, and even then it worked pretty well. The main problem then was the hardware. Webcams were clunky and unpredictable. They required extra drivers and programs to work. But for a free tool, it was pretty amazing. Well, it hasn't changed much since then, and all changes have been for the better.
Because the lab computer did not have Skype or webcams and microphones, I had to demo this tool using to of my devices. So, I displayed my MacBook for the class using the projector, and I called myself using my wife's Skype account on my iPad. The students could see both ends of the call with the devices in the lab, and we were able to discuss most of the features of the tool. Even though this tool requires each user to install the program, it is quite easy to use and has several applications in schools. My favorite is Mystery Skype, which I have not had a chance to do yet. Skype allows for conference video call with up to 10 users.
Google Hangouts
The next tool we looked at was Google Hangouts. I had never actually used this tool before because, well, I don't really have a reason to. I had looked into using it with a different class I teach, but it was not a good match for what I was trying to do. So, I was excited to see how this would work with a class of 7 people. Each person had a Google account for other projects we have been working on, so I knew everyone would be able to join the session.
The process for joining the Hangout was a little more involved than I had thought it would be, but I pointed out to my class that it gets easier after they have done it a couple of times. One everyone was in, we were able to test the different features of this tool. We looked at screen sharing, chat, YouTube sharing, and I even tried on a few of the silly masks and hats. Since the students did not have webcams, we were not able to share control of the meeting, but I think they got the point. One constraint to this tool for large classes is that only 10 people can join a Hangout at one time. Hangouts on Air allows unlimited viewers, but as I will discuss, there are some limitations
After using Hangouts for a few minutes, we switched over to Google Hangouts on Air. I showed them my screen as I set up the live broadcast, then I showed them how to find the live feed. I enabled the Q&A feature (which in order to use, users must be logged in with a Google account) before I broadcast the meeting, and we were able to post a few questions and answers, which when clicked snap directly to each response without watching the entire video. We also used a stopwatch to monitor the lag time between when I did something on the screen and when the viewers actually saw. We determined that it was about 45 seconds, which was better than the first time I used Hangouts on Air.
One feature I personally like about Hangouts on Air is that the broadcast is automatically recorded and sent to my YouTube account. This removes the Q&A responses from the video, but it quickly creates an archive that others can watch within minutes of the original broadcast. If viewers access the recording from my Google+ profile, the questions and answers are still there. Overall, I am impressed by the many features of this tool. Logistically, I will need to think through how to use the Q&A tool with my class, but compared to other tools it is pretty easy to set up and use.
Join.Me
I first found out about this tool a few years back when I had to train a new instructor in a different state how to use Moodle. Even though she could not figure out the audio call feature and we had to use the phone, it was a great way for me to walk her through the LMS and answer questions about the course. Since then, this tool seems to have gotten even better and it is a great way to communicate with people, especially if you are helping them troubleshoot a problem on their computer or performing a demo of some software that runs on your machine.
Of all the solutions so far, this is the easiest one for collaborating or conferencing with a small group of people. The person who initiates the call is given a 9-digit code, which users can enter to join. The session can either be hosted directly through the browser, or users can install the join.me application on their computers, which allows the extra benefit of different people taking turns sharing their screens. The browser option only allows the session initiator to share his screen, which in this case was me.
Join.Me also has an audio feature where attendees can talk using an internet connection or phone call. Since no one in the class had a microphone, we were not able to test this feature, but when I joined the session from my iPad, the call feature worked great. This tool also has the ability to allow different attendees to control the host computer, and you can send files to the users from your computer. In terms of attendee engagement, there is a chat feature for questions or backchannel jibber jabber. Each session, when using the free account, allows 10 people to join a session.
Ustream
The final tool we looked at, which I have written about before, was Ustream. This is similar to Hangouts on Air, but there are some unique differences that make it better suited from some types of presentations. There are two ways to broadcast to a large audience: Broadcaster and Producer. Broadcaster works directly through the browser and only shows video from the webcam. There is no way to share your screen, which may be a limitation for some types of presentations. Producer is a free application you can download from Ustream, and it does enable screen sharing using yet another downloaded app. This option was a little hard to figure out the first time I was testing it, but it was pretty simple once I got used to it. Compared to Hangouts on Air, the lag time is much better. We tested it a couple of times, and it was around 15 seconds.
This tool does not automatically record broadcasts, but you have that option if you want. The presenter can turn the record feature on an off during the presentation, which might be a good way to break it up into smaller segments for later viewing. Whereas the landing page for Hangouts on Air is the presenters profile on Google+, Ustream lets you set up a "channel" that serves as a hub for all of your presentations. I like this better than the Google+ profile page, which serves as a hub for all my posts and updates. Ustream would definitely be easier to navigate as a student who is trying to find an archived recording because the broadcasts are not crowded out by other content. Recordings can also be migrated to YouTube if you want to embed it in a web page or blog.
Each broadcast also has a Social Stream feature, but users must be logged into Facebook, Twitter, or Ustream to post questions. I am pretty sure my students don't want their questions showing up in their Twitter feeds, so this may not be a great feature for all people. Just like Hangouts on Air, an unlimited number of users can view the presentation, but it is a one-way conversation. If you are collaborating with a small number of people, I recommend one of the other options.
And the winner is ...
Clearly, each tool we tested in my class has its unique set of features and some limitations. Some are good for small group collaboration, others are good for large presentations. Some are better for screen sharing, and others are good for performances. Just like with all technology solutions, you need to analyze the context in which the tool will be used before you settle on a tool. The context should dictate your choice of tool. This was a great experience for my students, and the whole process was actually pretty fun. I think 4 different tools is the ideal number to test in a 2-hour class meeting, and each student walked away with some good information about the affordances and constraints of different video conferencing tools.